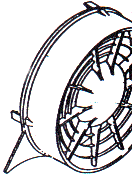
Rotax 503 fan belt adjustment, adjusting the fan belt on the Rotax 503 aircraft engines. |
|||||
|
|||||
|
|
|||||
| Rotax engine - fan belt adjustment. | |||||
|
|
|||||
Adjusting the Rotax Aircraft Engine Fan belt.
The Rotax maintenance
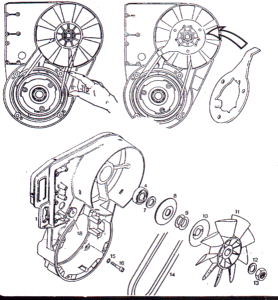
schedule suggests the belt be checked every 25 hours of use. To tighten the belt remove
shims from between the two fan halves. On new engines these shims
are placed behind the back fan pulley #8, on older model engines
they can be placed under the lockwasher. When reinstalling the fan and tightening the nut turn the fan over as you tighten down on the nut, or you will catch the belt, which could damage it. Once you have the nut snug use the fan wrench tool to lock the fan while you torque the nut to 40 ft. lbs.
|
|||||
|
|
|||||
|
Ultralight Aircraft News Web Magazine .-.-.-. .
No part of this
publication may be copied or distributed, transmitted, transcribed,
stored in a retrieval system, or translated into any human or computer
language, in any form or by any means, electronic, mechanical,
manual, or otherwise, without written permission .
By copying or paraphrasing the intellectual
property on this site, you're automatically signing a binding contract
and agreeing to be billed $10,000 payable immediately. Copyright Ultralight News - Ultralight Flyer. EMAIL
. |


 sult
in a loss of horsepower and overheating. A belt that is too tight
can result in incorrect ignition timing! Which could lead to
engine failure.