|
FREQUENTLY ASKED QUESTIONS ABOUT FALCON
WING COVERINGS
=====================================================
It was made in a number of different
finishes, shrink characteristics and thicknesses, only one of which was usable for this application.
It is a PVF film (Poly Vinyl Fluoride) 2 mil thick,
shrinkable. Spec is TTR20SG4, available only in enormous quantities. Du
Pont forbade its use once they found out the application it was used for.(
Wonder why). For reasons of disclaimer and liability Falcon East therefore
cannot endorse the use of it either and is presenting this information for
informational purposes only.
HOW SAFE IS IT?
The original Tedlar seemed to hold up quite well on the Ultralight
models. I am not aware of any failures. The Lazairs used it first, quite
successfully. The 2 seat XP is a different story. I personally know of six
failures, mostly upper covering separating in flight. An experienced pilot
has a good chance to land the aircraft safely with extensive cross
controls. I know from experience, I am one of the six. Prudent preflight
and repairing of poor tapes is always an essential prerequisite. The
problem is not the Tedlar, rather the glues used on the tapes, which dry
out and deteriorate and are directly related to sun light exposure. Thatís
why all tape areas must be protected with reflective silver tape, even the
bottom tapes, as the ground will reflect lots of UV rays as well. Bottom
Line: NEVER ON XPs. If possible store indoors, or make wing covers. They
can be made cheaply of polytarp, the UV resistant kind and some bungee
cords. Drape over the top, bungees under the wing.
CAN I STILL GET THE TEDLAR ?
Yes, there are other sources of exactly the same material, it is
used in a number of other applications now, mostly as an anti static and
anti dust film to cover plastic products. You will notice that the PVF
film does not pickup and hold static dust like most plastic films do. Be
careful though, the stuff used for greenhouses may not the same, be sure
you know what you are getting. You donít want to make a mistake here!
Proper adhesion of tapes is a must, yet the product is so smooth that it
resists adhesion. The 2" PVF tape is quite costly, since it is made of the
PVF film, slit into 2" strips, then etched in order to allow adhesives to
stick to it, Falcon East has the film and all tapes available, but lately
the 2" PVF tape is only available in white, no longer clear.
HOW ABOUT SOME SUBSTITUTE MATERIAL ?
Not to my knowledge, There are similar products made, such as Tefzel,
but they always seem to lack some important characteristics, like
thickness, UV resistance, shrinkability, etc.
WHAT ARE MY OTHER OPTIONS ?
There are many, all based on polyester fabrics. I will summarize the
most practical ones here:
1. Original Tedlar (or at least its substitute )
2. Modified Fisher method, 1.6 oz Ceconite
3.Superflite method 1.8 oz dacron
4 Stits method 1.7 oz dacron.
5 Hipec method.
6 My method.
BUT FIRST, HOW DO I GET THE OLD STUFF OFF ?
With great difficulty. In all cases, the old stuff must be removed,
glue and all, right down to the clean metal. I have found the following to
be the fastest method:
Rest the wing on a couple of well padded saw horses. Remove all Tedlar,
loose tapes; then scrape the foam rib caps tapes. Always work with a good
flexible but dull putty knife, the acrylic glue is really tough to get
off, and you donít want to cut into the soft aluminum with anything sharp.
Then work paint stripper over all tape glue areas and scrape off when
done. Repeat process.
Next, soak remaining glue lines liberally with enamel reducer and a
scratchy brush ( forget thinners, acetone, etc.) , initially scrape off
with putty knife and wipe off frequently with rags; this is messy work,
keep soaking. Eventually scrape off remainder with scotch brite pads,
dipped in reducer. Follow up with rags with reducer. Plan to spend 15 to
20 hours on this messy job.
In the end it must be cleaned with acetone prior to covering.
During all this process it is imperative not to allow any solvents to
come onto the foam ribs or run inside the aluminum skinned ribs. The foam
will quickly disappear.
THE TEDLAR METHOD, BRIEFLY:
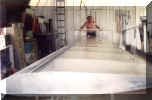
Foam tape is applied to the rib caps, seamstick tape to the outer
perimeters, along the D-tube. Tedlar is laid down and applied to the tape
lines and trimmed. Flip side gets done same way, trailing edge overlapped,
trimmed.
The film gets initial heat shrink with a propane radiant heater
2" PVF or similar tape is placed at overlaps and perimeters. Some more
final shrinking
Finally a 2" silver tape is applied over all tape lines for UV
protection.
Assemble- ready to fly. Video is a must to do it right.
WHAT SHOULD I WATCH OUT FOR ?
The only critical part is to assure that there is an excellent bond
between the tapes, especially the 2" white PVF tape and the aluminum,
especially on the upper surface at the d-tube overlap. This is best
accomplished by making sure the aluminum is clean, scuffed with fine
scotch brite and acetone. The tape is then applied and rubbed and adhesion
is assured with the aid of a heat gun. Best result is noticed when the
tape is so well bonded that no air bubbles or haze can be seen. This holds
true for patching and repairs as well.
WHAT ARE THE ADVANTAGES AND DISADVANTAGES OF THE PVF FILM METHOD ?
Advantages: Comparatively inexpensive, lightest of all, quickest of
all, easy to do, no painting expertise required,
great see-through appearance, all interior components visible, easy to
repair. Can be painted. Tedlar is UF proof.
Disadvantages: Unreliability of tapes. Frequent care, checking and
patching required. Tapes, or rather the adhesives of the tapes deteriorate
in sun, heat, UV. Tapes start to look shabby and unreliable when aging.
Not tear resistant like rip- stop fabrics. No other practical adhesion
methods besides tapes.
( However if the entire panel should tear off in flight, the aircraft
will still fly; I speak from first hand experience )
HOW DO I FIX THE TEDLAR ?
Minor tears and punctures can be repaired with 2" wide 3M 355 packing
tape or similar. Itís 2 mil, acetate adhesive. Then heat shrink carefully
with a heat gun so as not to melt the 3M tape. A better tape is the 2" PVF
tape, but costs 65.- a roll/36y. The 3M tape starts to melt and curl at
the edges at about the same temperature that the Tedlar shrinks, whereas
the PVF tape has the same shrinking characteristics as the film, and will
not melt and curl, since it is actually made of the same PVF film.
If needed, complete rib-rib panels can be replaced, in essentially the
same way as the wing is covered.
Where the 2" tapes start to loosen or crumble the ideal method is to
replace them again with the costly PVF tape.
The cheaper way is to replace them with 3M355 or similar tapes, but
they will probably have to be redone annually.
In any event follow the process as listed in "WHAT SHOULD I WATCH OUT
FOR "ABOVE.
WHAT DO I NEED FOR THE TEDLAR METHOD, WHAT IS THE COST ?
To do a whole airplane:
100ft PVF film 64" at $ 3.95/ft 395.-
4rl Seamstick Tape $ 12.- 48.00
2rl PVF Tape $ 45.0 90.-
2rl Silver Mylar $ 45.0 90.-
1rl Foam Tape $ 72.00 72..-
Total materials 695.- **
Consider also the original Falcon manual which includes the PVF wing
covering process at $ 49.00
and also the final assembly video which also includes the PVF wing
covering process at $ 39.00
All available from Falcon East.
WHAT ABOUT THE FISHER METHOD ?
The Fisher Aero people sell 1.6 ounce, 64" Ceconite for $ 3.50/yd, but
no other materials, not even a manual.
The method, briefly: Ceconite is applied, using either Stits,
Superflite or 3m adhesives, then heatshrunk. I suggest covering all around
the D-tube. The UV protection is accomplished by applying two coats of
black exterior latex, mixed with Flowtrol ( liquifier-leaves no brush
strokes ) working it in with foam brushes. This is followed by a tack coat
of Du Pont Dulux automotive enamel with a bit of flex agent and a finish
coat of the same paint mix. If preferred, Urethane Paints can be
substituted for the Dulux, but at considerably higher cost. Hardly any
sanding required between coats.
Best to install PK screws with washers or 1/8 LF rivets onto upper
ribcaps for peace of mind. About every 8" or so.
.
WHAT ARE ADVANTAGES/DISADVANTAGES OF THE FISHER METHOD ?
Advantages: Cheapest of the fabric methods. Lightest of the fabric
methods. Easy to do, latex is cheap and easy to obtain.
Relatively good finish, considering cost. No sanding between coats, not
very labor intensive. Repairs are easy.
The only gun painting required is for the paint coats.
Disadvantages: The finish is good, but not air show quality, weave is
still visible. Durability and UV protection not as great as more expensive
methods. Difficult to find Du Pont Dulux in some areas, obsolete.
Substitutes do not work well, too brittle. Urethanes bring up the cost
again. No manual, no video.
WHAT WILL IT COST, USING THE FISHER METHOD ?
Figure , approximately:
26 y 1.7 Ceconite @3.50/y 91.00
3q Adhesive 65.-
1g MEK solvent 15.-
1g Latex 20.-
1g Flowtrol 15.-
1g Enamel 75.-
1g Reducer 20.-
1g Thinner 20.-
Total, basic ** 325.-
Plus misc. supplies, such as PK screws, washers, inspection holes,
supplies.
Urethane paint in place of the Dulux can cost about 425.-between the
paint, catalyst and reducer.
You need to subtract Dulux items of course to see the difference.
Fisher Aero supplies only the fabric and can be contacted at 614
820-2219.
WHATíS THE SUPERFLITE SYSTEM LIKE ?
In brief: Superflite (in our application system 2L) starts with 1.8 oz
Dacron, is applied with their own glue, heatshrunk, then final taped,
finish shrunk. 2 coats of light gray urethane primer filler with clear UV
blocker are sprayed on, preferably via HVLP gun and provide half of the UV
protection. Air craft can actually be flown at this point The balance of
the UV protection is provided by the two final coats of Urethane high
solids paint with clear, again via HVLP .Very little sanding, if any
required. This system is the system of choice of many kit manufacturers
today UV protection is provided by the clear portions in the primer-filler
and finish coat , not silver. Works in sunscreen lotions !
ADVANTAGES/DISADVANTAGES OF SUPERFLITE ?
Advantages: Very good final product, very good finish. Good UV
protection. No great skills required.
Good results considering the low labor effort involved. Hardly any
sanding. Tolerates range of working temperatures.

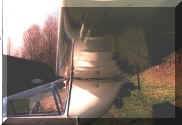
This is the quality obtained by the Superflite
Method,
( click to enlarge)
Simple 4 page manual. Video 19.95. Many colors available.
Disadvantages : Higher priced than Tedlar or Fisher method. Catalyst
paints have limited (but adequate) working time.
HOW ABOUT THE COST OF SUPERFLITE SYSTEM ?
In summary, to cover a Falcon, over the d-tube:
Basic materials package: 26 y dacron, glue, 3" tapes, 2" tapes, MEK,
grommets,
PK screws, washers, inspection holes, $ 250.00
Primer package: Base, flex agent, reducer, catalyst $ 425.00
Paint Package: Paint, reducer, catalyst, flex agent $ 425.00
Total: ** $1100.00
The UL can be covered up to the D-tube with some precautions, but the
cost savings are not significant. The XP should have the D-tube covered
due to the higher wing loading. Again for peace of mind I would install
rivets or screws on upper rib caps.
The Peregrine Falcon will have the d-tube exposed, not covered.
Falcon East is a distributor for Superflite and we can supply detailed
information and manuals, color charts at no charge.
Video costs $ 19.95.
HOW ABOUT THE STITS SYSTEM ?
The Stits system is by far the best known and revered method. It draws
admiration and praise and is the choice of exhibitors and show plane
owners. Possibly overkill for Falcons. But the price is high, in dollars
and labor and weight. Many coats and much sanding involved. Stits is now
owned by Aircraft Spruce and available from them and other suppliers as
well. AC Spruce 800 831 2949
In summary: Start with 1.7 oz material, apply with their polytack
cement, heatshrink.
Then comes a brush coat of filler, called Poly brush, then finishing
tapes, etc.
Next come 2 sprayed coats of Poly brush filler.
Next come 2 coats of Poly Tone spray with UV blocker for some UV
protection, sanding between coats.
For best UV protection, use 3 cross coats of silver Poly Spray instead
of the previous line, but at the cost of another r 8 to 10 lb. in weight!
System will already be weighing almost 20 lb.
Best to finish with silver or white colors for improved UV protection.
The Stits manual gives a number of possible choices, including an UL
method.
ADVANTAGES/DISADVANTAGES OF STITS ?
Advantages: A real professional look, a show stopper. Shiny, glossy,
wet look, if done right.
Good manual, 1/2 " thick, $ 5.-,Good video, 40.- ,products available at
major aviation catalog houses STCíd.
Excellent UV protection and service life.
Disadvantages: Probably the most costly method, the heaviest, and most
labor intensive of the popular methods.
Sanding suggested between virtually every coat. weighs close to 20 lb.
The amount of products and names and what they do can become outright
overwhelming and confusing,. For pros, possibly overkill for Falcons.
COSTS OF THE STITS SYSTEM ?
Doing a quick calculation, I come up in the neighborhood of 1300.- to
1500.-even 2000.- if you want a shiny clear coat, but there are so many
variables, which can change these numbers drastically. Best to study the
manual and video, in order to narrow down the decision compromises, then
contact several suppliers and compare their knowledge, service and
helpfulness. Donít shop for price, there wonít be much of a difference,
shop for service.
MY PREFERENCE:
I personally prefer a variation of the Fisher method, something that
has proven to be very easy, reliable, lasting, and most important
inexpensive. Start with 1.7 oz Ceconite for the UL and 2.7 oz Ceconite for
the XP, use the adhesives as supplied by Superflite ( or Stits if you
prefer ) and follow Superflite video instructions. Go completely over
D-tube, put 1/8 large flange aluminum rivets into upper rib caps about
every six inches, cover with tape. Tapes wherever overlaps or
reinforcements may be needed. Next, wash with Spic and Span to remove
processing oils. Let dry. Paint with Exterior Latex flat black house
paint, thinned with Flotrol, applied by working though the fabric with a
sponge. Two coats. Then paint with Poly Urethane automotive paint with
flex agent. That is a two stage paint. Use an HVLP gun. Careful, fumes are
very dangerous, if possible have a pro or shop do it. Donít inhale the
vapors. One flash coat, one color coat. Lasts as long and is as durable as
paint on automobile rubber or plastic bumpers. Inexpensive, excellent
results, donít have to be a pro.
NOW WHAT ?
There are others you may consider, possibly HIPEC, from Falconar, in
Alberta CAN. 403 465-2029, also available from LEAF ( 800 LEAFINC) in the
US. Check it out, as there have been a number of recent articles on two
Lazairs recovered using HIPEC.
Then there is Air-Tech, similar to Superflite, but offering three
different finish coats.
I also suggest you read March 97 Kitplanes article: Covering Pursang,
John Larsen briefly reviews Stits and Superflite and speaks of others,
going further into depth than my summary here. A must reading if you are
considering fabric. ,
You may also invent your own combination of methods as I have done,
like using Fisher material with Hipec Paints or any other combination.
Careful though, some things do not mix. Make test samples first.
In summary, covering choices involve compromises and there is no
"perfect covering method". Best is to educate one self and decide on
importance of features and priorities. The final decision, like everything
else in life will be some sort of compromise.
DISCLAIMER: The above information is provided in order to assist
you in making your decision. Mike Fithian or Falcon East makes no claim as
to validity or accuracy of any information provided. You must follow up
and read all available information and only you are responsible for the
final product and its use. Since there are many variables and we have no
control over the application or final use we cannot accept any
responsibility whatsoever. ( Howís that! )
3/97 /rev 05/02 FALCON EAST |


